harmony 鸿蒙跨线程嵌入式组件 (IsolatedComponent,仅对系统应用开放)
跨线程嵌入式组件 (IsolatedComponent,仅对系统应用开放)
IsolatedComponent组件是构建隔离组件的工具,能够帮助开发者创建独立且可重用的组件。这些组件可在不同应用程序中使用,不会与其他组件产生冲突。
每个IsolatedComponent组件独立存在,具有专属的作用域和生命周期,不与其他组件共享状态或数据,能够方便地在不同应用程序中重用,降低重复开发的工作量。
基本概念
IsolatedComponent旨在在本页面中嵌入并展示由独立Abc(即.abc文件)所提供的UI,其展示内容在受限的worker线程中执行。
该组件通常用于有Abc热更新诉求的模块化开发场景。
约束与限制
Abc需要bundleManager.verifyAbc校验通过之后才可以使用于当前组件。
不支持构造参数更新,仅首次传入有效。
不支持IsolatedComponent组件嵌套场景。
主线程与受限worker线程之间布局渲染是异步处理,布局变化、旋转等导致的页面变化存在不同步现象。
主线程与受限worker线程之间事件传递是异步处理,不支持线程之间的事件冒泡,线程之间的UI交互存在事件冲突现象。
当独立Abc通过IsolatedComponent组件嵌入到宿主进程中显示时,即表明其内容完全向宿主开放,宿主可对独立Abc的内容进行操作。因此,涉及安全敏感的场景应禁用此功能。
独立Abc运行在受限worker线程中可保证相对安全,并且不会影响主线程。
场景示例
该场景展示IsolatedComponent组件的基础使用方式,示例应用的bundleName为”com.example.isolateddemo”,并使用本应用的Abc文件和extension页面作为嵌入展示的内容。
导入核心模块
在使用IsolatedComponent组件时,首先需要导入@kit.AbilityKit模块,该模块提供了构建隔离组件所需的必要功能,包括bundleManager等关键API。
bundleManager作为AbilityKit的核心组件,提供了管理应用包的能力,是构建IsolatedComponent的基础。通过导入此模块,能够使用其提供的API来创建和管理隔离组件,确保不同组件之间的数据和资源隔离,从而提高应用的安全性。
import { bundleManager } from '@kit.AbilityKit';
权限管理
使用IsolatedComponent组件时,合理配置requestPermissions标签是保障组件在受限环境中安全运行的关键步骤。通过此配置,能够准确指定组件所需的权限,实现权限的精细化管理。
在受限模式下,IsolatedComponent组件默认不具备执行动态代码的能力。通过在module.json5配置文件中添加requestPermissions标签,可以授权组件在特定条件下执行动态下发的方舟字节码。
"requestPermissions": [
  {
    "name": "ohos.permission.RUN_DYN_CODE",
    "usedScene": {
      "abilities": [
        "EntryAbility"
      ],
      "when": "inuse"
    }
  }
]
受限worker
受限worker是一个在隔离环境中运行的worker线程。这种隔离特性确保了受限worker与其他线程或组件之间实现内存隔离,避免它们之间的相互干扰或安全问题。
在IsolatedComponent场景中,组件常需动态加载外部hap资源。受限worker通过以下机制保障安全:
- 沙箱路径校验
abcPath指向经系统校验的安全目录,防止恶意代码注入。
- 通信管控
主线程与worker间仅允许通过规范化的消息事件通信,禁止直接数据共享。
- 异常隔离
worker内错误不会导致主应用崩溃,通过onerror事件可控处理。
// OhCardWorker.ets
import { worker, ThreadWorkerGlobalScope, MessageEvents, ErrorEvent } from '@kit.ArkTS';
const workerPort: ThreadWorkerGlobalScope = worker.workerPort;

workerPort.onmessage = (e: MessageEvents) => {}
workerPort.onmessageerror = (e: MessageEvents) => {}
workerPort.onerror = (e: ErrorEvent) => {}
IsolatedComponent({
  want: {
    "parameters": {
      // 资源路径
      "resourcePath": `${getContext(this).filesDir}/${this.fileName}.hap`,
      // Abc文件校验后的沙箱路径
      "abcPath": `/abcs${getContext(this).filesDir}/${this.fileName}`,
      // 需要显示页面的入口路径
      "entryPoint": `${this.bundleName}/entry/ets/pages/extension`,
    }
  },
  // 受限worker
  worker: new worker.RestrictedWorker("entry/ets/workers/OhCardWorker.ets")
})
IsolatedComponent通过want和worker属性实现动态组件加载与隔离执行,二者共同构成安全边界。合理设置这些属性是确保组件能够安全运行的关键。
其中,在受限worker线程中运行的入口页面文件ets/pages/extension.ets参考内容如下:
@Entry
@Component
struct Extension {
  @State message: string = 'Hello World';

  build() {
    RelativeContainer() {
      Text(this.message)
        .id('HelloWorld')
        .fontSize(50)
        .fontWeight(FontWeight.Bold)
        .alignRules({
          center: { anchor: '__container__', align: VerticalAlign.Center },
          middle: { anchor: '__container__', align: HorizontalAlign.Center }
        })
    }
    .height('100%')
    .width('100%')
  }
}
示例应用代码
以下示例是在应用中,EntryAbility(UIAbility)加载首页文件ets/pages/Index.ets的内容。
import { worker } from '@kit.ArkTS';
import { bundleManager, common } from '@kit.AbilityKit';
import { BusinessError } from '@kit.BasicServicesKit';

// 对Abc文件进行校验,并拷贝到指定沙箱路径下
function VerifyAbc(abcPaths: Array<string>, deleteOriginalFiles: boolean) {
  try {
    bundleManager.verifyAbc(abcPaths, deleteOriginalFiles, (err) => {
      if (err) {
        console.error("VerifyAbc failed, error message: " + err.message);
      } else {
        console.info("VerifyAbc successfully.");
      }
    });
  } catch (err) {
    let message = (err as BusinessError).message;
    console.error("VerifyAbc failed, error message: " + message);
  }
}

@Entry
@Component
struct Index {
  @State isShow: boolean = false;
  @State resourcePath: string = "";
  @State abcPath: string = "";
  @State entryPoint: string = "";
  @State context: Context = this.getUIContext().getHostContext() as common.UIAbilityContext;
  // Abc文件名
  private fileName: string = "modules";
  // Abc文件所属应用的bundleName
  private bundleName: string = "com.example.isolateddemo";
  // 受限worker
  private worker ?: worker.RestrictedWorker = new worker.RestrictedWorker("entry/ets/workers/OhCardWorker.ets");

  build() {
    Row() {
      Column({ space: 20 }) {
        // 1.调用verifyAbc接口校验Abc文件
        Button("verifyAbc").onClick(() => {
          let abcFilePath = `${this.context.filesDir}/${this.fileName}.abc`;
          console.log("abcFilePath: " + abcFilePath);
          VerifyAbc([abcFilePath], false);
        }).height(100).width(200)

        // 2.显示IsolatedComponent
        Button("showIsolatedComponent").onClick(() => {
          if (!this.isShow) {
            // 资源路径
            this.resourcePath = `${this.context.filesDir}/${this.fileName}.hap`;
            // Abc文件校验后的沙箱路径
            this.abcPath = `/abcs${this.context.filesDir}/${this.fileName}`;
            // 需要显示页面的入口路径
            this.entryPoint = `${this.bundleName}/entry/ets/pages/extension`;
            this.isShow = true;
          }
        }).height(100).width(200)

        if (this.isShow) {
          IsolatedComponent({
            want: {
              "parameters": {
                "resourcePath": this.resourcePath,
                "abcPath": this.abcPath,
                "entryPoint": this.entryPoint
              }
            },
            worker: this.worker
          })
            .width(300)
            .height(300)
            .onError((err) => {
              console.info("onError : " + JSON.stringify(err));
            })
        }
      }
      .width('100%')
    }
    .height('100%')
  }
}
预期效果
在DevEco Studio上编译构建生成hap包,并安装到设备上;
将本应用构建生成的modules.abc文件通过DevEco Studio或hdc工具上传至应用沙箱路径/data/app/el2/100/base/com.example.isolateddemo/haps/entry/files下,其中,hdc工具参考命令如下:
hdc file send modules.abc /data/app/el2/100/base/com.example.isolateddemo/haps/entry/files/
- 打开应用页面,点击”verifyAbc”按钮进行校验,输出”VerifyAbc successfully”日志;
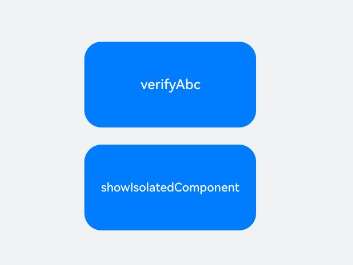

- 点击”showIsolatedComponent”按钮,显示IsolatedComponent组件,内容为”Hello World”。
你可能感兴趣的鸿蒙文章
热门推荐
-
2、 优质文章
-
3、 gt
-
7、 openharmony
-
9、 golang
-
10、 Vue中input框自动聚焦