harmony 鸿蒙如何实现内容下拉变化
如何实现内容下拉变化
场景介绍
组件开发过程中经常遇到组件堆叠,上层组件下拉,下层组件随之变化的场景。常见的如朋友圈背景的下拉放大,内容的下拉刷新等。本例将为大家介绍如何实现上述下拉变化的场景。
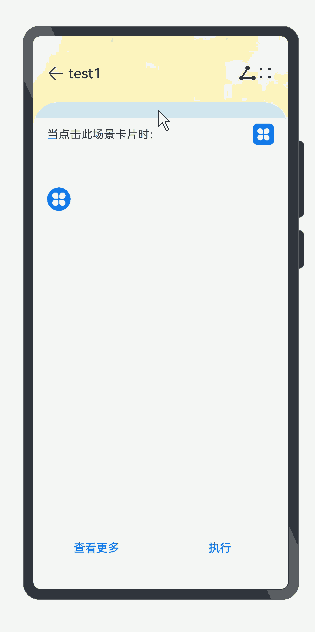
效果呈现
效果图如下:
运行环境
本例基于以下环境开发,开发者也可以基于其他适配的版本进行开发: - IDE: DevEco Studio 3.1 Beta2 - SDK: Ohos_sdk_public 3.2.11.9(API Version 9 Release)
实现思路
本例的3个关键特性及实现方案如下: - 界面不同背景的展示:通过Stack堆叠容器实现界面之间的覆盖 - 中间子组件的下拉和回弹:通过ontouch事件判断heightValue的大小去设置可滑动的中层组件的动画效果 - 底层子组件的文本变化:判断heightValuede来决定文本的变化
开发步骤
通过Stack堆叠容器创建各层子组件和文本 具体代码块如下:
ts
// 底层子组件
...
Stack({ alignContent: Alignment.Bottom }) {
  build() {
    Stack({ alignContent: Alignment.Bottom }) { //底部对齐
      Column() {
        Row() {
          Image($r('app.media.back')).width(25).height(25)
            .onClick(() => {
              router.back();
            })
        ...
        Image($r("app.media.sharew")) //分享
            .width(25)
            .height(25)
        Image($r('app.media.more')) //更多
            .width(25)
            .height(25)
        }.width('100%').padding(20).margin({ top: 20 })
        ...
      }
      .height(this.ImHeight)
      .width(this.ImWidth)
      .backgroundImage($r('app.media.images')) //底层背景图
      .backgroundImageSize(ImageSize.Cover)
    ...
    }
  }
}
...
//中层子组件
...
  Column() {
    Row() {
      Text('当点击此场景卡片时:').fontSize(16)
      Blank()
      Image($r('app.media.bl_harm')).width(30).height(30)
    }.width('100%').margin({ top: 10, left: 10, right: 10, bottom: 20 })
  }.borderRadius(35)
...
//颜色渲染,线性渐变
    .linearGradient(
      {
        direction: GradientDirection.Top,
        angle: 180,
        colors: [['#c7e2eb', 0.01], ["#F7F7F7", 0.05], ["#F7F7F7", 1]]
      })
//底层子组件
...
Column() {
  Flex({ alignItems: ItemAlign.Center, justifyContent: FlexAlign.SpaceEvenly }) {
    Button({ type: ButtonType.Capsule, stateEffect: true }) {
      Row() {
        Text('查看更多').fontSize(16).fontColor(Color.Blue).margin({ left: 5, right: 12 })
      }.alignItems(VerticalAlign.Center)
    }.height(40).borderRadius(25).backgroundColor('#EBEBEB').width('45%')
    Button({ type: ButtonType.Capsule, stateEffect: true }) {
      Row() {
        Text('执行').fontSize(16).fontColor(Color.Blue).margin({ left: 5, right: 12 })
      }.alignItems(VerticalAlign.Center)
    }.height(40).borderRadius(25).backgroundColor('#EBEBEB').width('45%')
  }
}.height('10%').width('100%').align(Alignment.Top).backgroundColor('#F7F7F7')
...
通过ontouch事件判断heightValue的大小去设置可滑动的中层组件的动画效果 具体代码块如下:
...
.onTouch((event: TouchEvent) => { //触摸事件
  if (event.type === TouchType.Down) {
    this.duration = 1000;
  }
  if (event.type === TouchType.Up) { // 结束,回弹,回弹动画更快
    this.heightValue = '88%'
    this.duration = 500;
    this.ImHeight = "100%"
    this.ImWidth = "100%"
  }
  if (event.type === TouchType.Move) {
  // 根据滑动距离确定组件高度,最多拖动140的,此时组件最小高度为68%
    if (event.touches[0].y <= 140) {
      this.heightValue = 88 - event.touches[0].y / 7 + '%'
      this.ImHeight = "200%"
      this.ImWidth = "200%"
    } else {
      this.heightValue = '68%'
    }
  }
  console.info('垂直方向滑动距离' + event.touches[0].y)
})
.height(this.heightValue)
.animation({
  duration: this.duration, // 动画时长
  curve: Curve.FastOutSlowIn, // 动画曲线
  delay: 0, // 动画延迟
  iterations: 1, // 播放次数
  playMode: PlayMode.Normal // 动画模式
})
判断可滑动的中层组件的高度变化来体现标题栏的变化 具体代码块如下:
...
Row(){
  //可滑动的组件高度大于整体界面的70%,显示test1
  Text(this.heightValue >= '70%' ? 'test1' : '')
    .fontColor(Color.Black)
    .fontSize(20)
    .margin({ left: 5 })
}
...
Row() {
  Text(this.heightValue < '70%' ? 'test2' : '') //可滑动的组件高度小于于整体界面的70%,显示test2
    .fontColor(Color.Red)
    .fontSize(30)
    .margin({ left: 5 })
}
...
完整代码
示例完整代码如下: “`ts import router from ‘@ohos.router’
@Entry @Component struct DetailExample { @State heightValue: string = ‘88%’ @State duration: number = 1000 @State ImHeight: string = ‘100%’ @State ImWidth: string = ‘100%’
build() {
Stack({ alignContent: Alignment.Bottom }) {
// 底层子组件
Column() {
Row() {
Image($r(‘app.media.back’)).width(25).height(25)
.onClick(() => {
router.back();
})
Text(this.heightValue >= ‘70%’ ? ‘test1’ : “)
.fontColor(Color.Black)
.fontSize(20)
.margin({ left: 5 })
Blank()
Image($r(“app.media.sharew”))
.width(25)
.height(25)
Image($r(‘app.media.more’))
.width(25)
.height(25)
}.width(‘100%’).padding(20).margin({ top: 20 })
    Row() {
      Text(this.heightValue < '70%' ? 'test2' : '')
        .fontColor(Color.Red)
        .fontSize(30)
        .margin({ left: 5 })
    }
    .width("100%")
    .height(35)
    .alignItems(VerticalAlign.Center)
    .justifyContent(FlexAlign.Start)
  }
  .height(this.ImHeight)
  .width(this.ImWidth)
  .backgroundImage($r('app.media.images'))
  .backgroundImageSize(ImageSize.Cover)

  // 可拖动中层子组件,动画,圆弧
  Column() {
    Row() {
      Text('当点击此场景卡片时:').fontSize(16)
      Blank()
      Image($r('app.media.bl_harm')).width(30).height(30)
    }.width('100%').margin({ top: 10, left: 10, right: 10, bottom: 20 })
  }.borderRadius(35)
  .padding(20)
  .onTouch((event: TouchEvent) => {
    if (event.type === TouchType.Down) {
      this.duration = 1000;
    }
    if (event.type === TouchType.Up) {
      this.heightValue = '88%'
      this.duration = 500;
      this.ImHeight = "100%"
      this.ImWidth = "100%"
    }
    if (event.type === TouchType.Move) {
      if (event.touches[0].y <= 140) {
        this.heightValue = 88 - event.touches[0].y / 7 + '%'
        this.ImHeight = "200%"
        this.ImWidth = "200%"
      } else {
        this.heightValue = '68%'
      }
    }
    console.info('垂直方向滑动距离' + event.touches[0].y)
  })
  .height(this.heightValue)
  .animation({
    duration: this.duration,
    curve: Curve.FastOutSlowIn,
    delay: 0,
    iterations: 1,
    playMode: PlayMode.Normal
  })
  .linearGradient(
    {
      direction: GradientDirection.Top,
      angle: 180,
      colors: [['#c7e2eb', 0.01], ["#F7F7F7", 0.05], ["#F7F7F7", 1]]
    })

  // 最上层子组件
  Column() {
    Flex({ alignItems: ItemAlign.Center, justifyContent: FlexAlign.SpaceEvenly }) {
      Button({ type: ButtonType.Capsule, stateEffect: true }) {
        Row() {
          Text('查看更多').fontSize(16).fontColor(Color.Blue).margin({ left: 5, right: 12 })
        }.alignItems(VerticalAlign.Center)
      }
      .height(40).borderRadius(25).backgroundColor('#EBEBEB').width('45%')
      Button({ type: ButtonType.Capsule, stateEffect: true }) {
        Row() {
          Text('执行').fontSize(16).fontColor(Color.Blue).margin({ left: 5, right: 12 })
        }.alignItems(VerticalAlign.Center)
      }
      .height(40).borderRadius(25).backgroundColor('#EBEBEB').width('45%')
    }
  }.height('10%').width('100%').align(Alignment.Top).backgroundColor('#F7F7F7')
}
} } “`
参考
你可能感兴趣的鸿蒙文章
harmony 鸿蒙使用Badge组件完成聊天未读消息数量显示功能
- 所属分类: 后端技术
- 本文标签:
热门推荐
-
2、 优质文章
-
3、 gt
-
7、 openharmony
-
9、 golang
-
10、 Vue中input框自动聚焦